How Do You Curl Hair With Straightener?
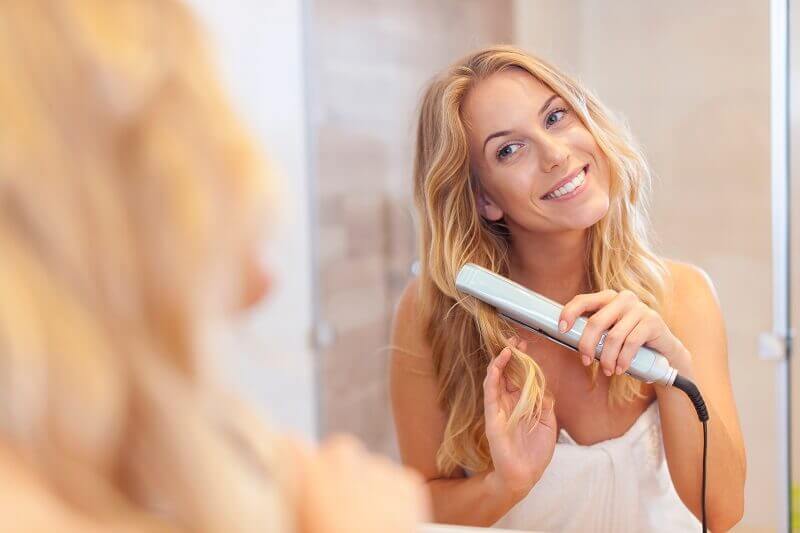
Do you too love those beautiful bouncy and curly locks? Yes we all love them don’t we? They look voluminous and extremely beautiful. Women with naturally curly hair are lucky but what about the women with straight hair? Yea yea, they will have to buy a curling iron and then curl their naturally straight hair. That’s the plan? No. Now you can get those beautiful bouncy and voluminous curly hair using your straightening iron !! Yes ,you read that right. Now you can curl your hair with a hair straightener !! A life saving hack isn’t it? Here in this article we shall tell you some easy steps to get easy curls at home with your regular hair straightener-
Steps to curl your hair with a hair straightener
Step 1- Prepare your hair
You can either wash and condition your hair the same day or the day prior. It has been known that dry and rough hair hold curl locks better. However, to avoid dirt and grease, you can wash your hair the previous day. Also, if there’s a sudden plan fixed then you should definitely go for dry shampoo.
Step 2- Remove the tangles from your hair
You should remove possible tangles from your hair to avoid formation of locks later. For this purpose, you can use a detangling spray and a tangle teezer to evenly spread the spray or a wide toothed comb. This will make your hair easily manageable while going for curling them.
To use the spray, sprinkle it over the complete length of hair avoiding the scalp. Use the tangle teezer to uniformly spread the spray for avoiding the formation of knots. The knotted hair looks dull and frizzy. You should always detangle it thoroughly before going for any kind of hair styling.
(Do not comb hair when it is wet, this may lead to hair falling at a much faster rate).
Step 3- Use heat protectant
This is the most important step while going for hair styling. This protects your hair from any kind of damage caused due to the use of hair styling products. This product works by creating a protective layer over hair and thereby protecting them from any kind of damage caused by high temperature or moisture. The heat protectant also has an anti static feature which controls frizzy hair and lets them shine.
To begin with , apply hair protectant throughout the length of the hair avoiding scalp and the roots. For easier application, you can divide complete hair into smaller sections so that the spray gets sprinkled in between the sections as well.
(Do not apply heat protectant over the scalp or roots. It is always better if you start from a few inches away from the roots).
Step 4- Make small sections of your hair
To go for hair curling, it is always good to divide hair into small sections so that becomes manageable.
- You can also go for half the top section of your hair to start with. Just take the top half section and wrap it in a bun using clips.
- The lower half section of your hair can be divided into two equal parts.
Now it totally depends upon you and your choice. You can be lazy and pick up big curls and get wavy hair. While by picking up small sections, you get that sensational beach hair look.
Caption– While starting, don’t go for high temperature. It will damage your hair. Better go for heat control products.
- Bring in front the lower section of your hair.
- Take out a small section of hair and wrap it completely around the straightening iron. This should be done in a way that the ends of the hair move freely between the plates.
- Now slowly untighten the plates and release pressure. Gently pull the straightener out, away from your face.
- To get long lasting curls, hold the plates for maximum 10 seconds.
- Once the lower section is done, go for the upper half section of your hair.
Avoid– Using the hair straightener for more than 10 seconds, this may result in damaging of hair.
This was an easy method to help you curl hair at home with a hair straightener. Curled hair does look beautiful and give a voluminous appearance to your hair.
There are various other methods also by which you can curl your hair like the slide technique. Also, check out professional hair dryer in this post.
Slide technique to curl your hair
- In this technique, you need to take out one inch section of your hair and slide the hair straightener through it in an inward and outward manner.
- It is just like the zigzag motion and you should start from the roots.
- This will help in creating soft curls or that perfect wavy hair look.
- This is one of the easiest ways to get curls and you don’t have to work hard much to get curls.
Some hacks to follow before going for hair curling
- Always use a heat protectant or a thermal hair styler before going for hair curling.
- Use a liberal amount of product and apply it evenly.
- Always keep the straightener away from the roots and the scalp.
- Move the iron so that heat is applied uniformly and not at a fixed place. This will also reduce the damage risk.
- Always work on small sections of hair. This makes it manageable to work.
- The curling should be start from the eye level in order to give it a more beautiful look.
- You can also first straighten the hair before curling it to give it a more glossy look.
- Lastly you can use a hair spray to fix it up. This will lock your curls for a longer time period.
So this was an easy DIY home guide on how to curl hair with a hair straightener. Wasn’t it a simple home task? Nobody knew that a simple hair straightener could do such a thing too!! Stay tuned with us more to get such life saving hacks !!